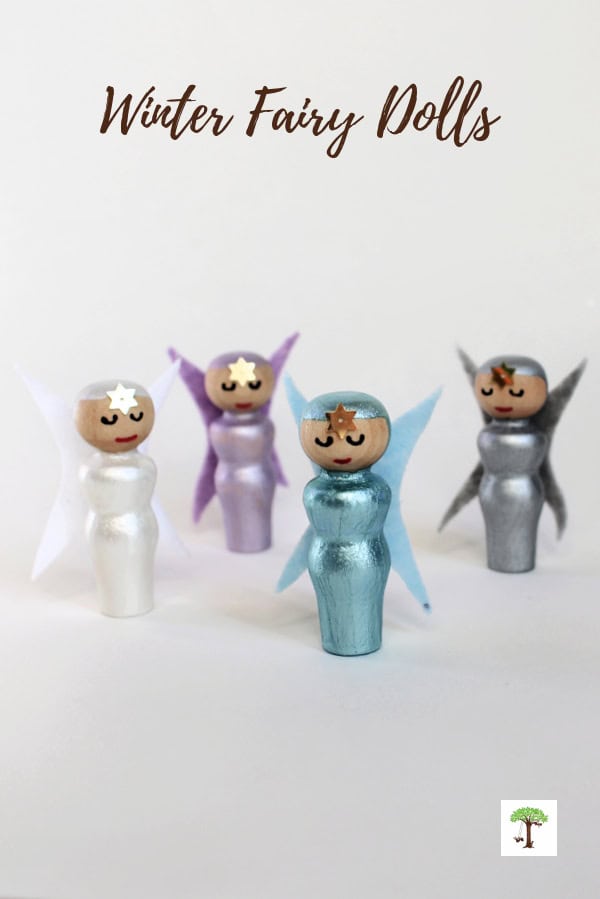
DIY winter fairy peg dolls are unique, homemade wooden toys for kids and whimsical DIY decor for teens and adults.
Creating wooden winter fairy doll crafts with or for a child can be a magical and imaginative experience. These whimsical dolls offer a unique canvas that inspires children and adults to explore the enchantment of winter. Transform everyday materials into tiny enchanted characters full of personality with a bit of paint, felt, and a touch of good old-fashioned ingenuity. From painting their wooden peg doll bodies in frosty, shimmering paint colors to crafting miniature felt wings to go with them, this fairy craft fosters fine motor skills, attention to detail, and an appreciation for winter’s beauty. With a bit of imagination, a plain wooden peg doll can become a gorgeous, shimmering winter fairy figurine.
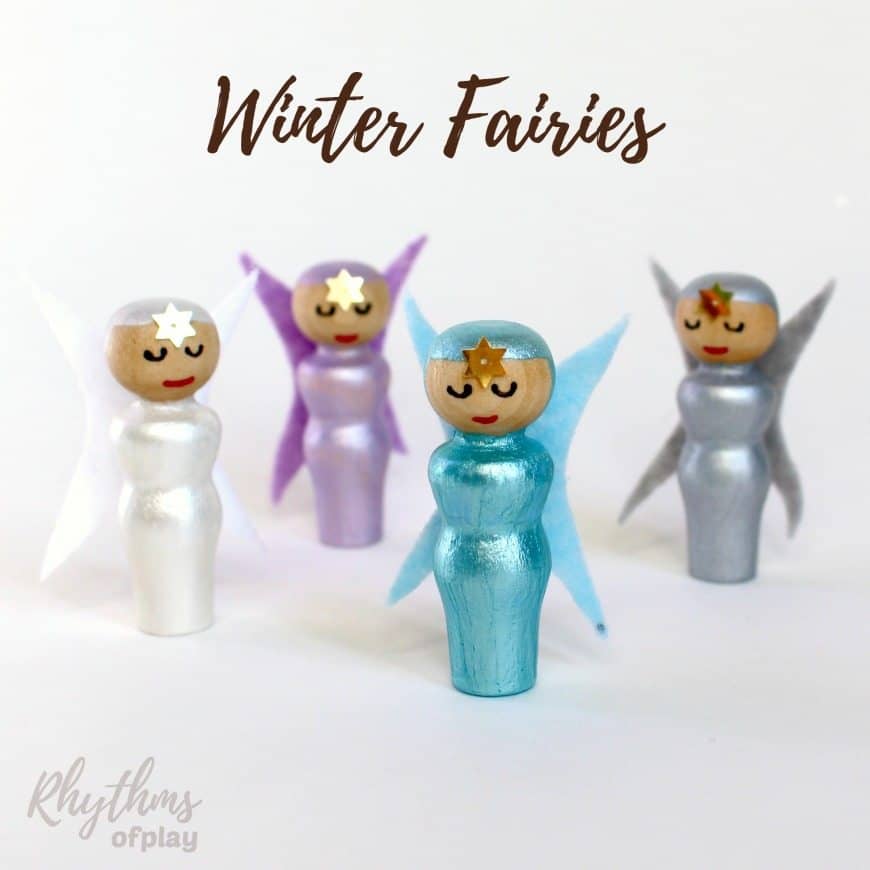
These charming wooden fairies can double as decorative ornaments and imaginative playmates, bringing a touch of seasonal charm into your home and igniting the child’s creativity throughout the winter months. The appeal of these wooden dolls comes from their simplicity. Each change in color or expression enhances the unique personality of every fairy doll craft. They are the perfect handmade toy for pretend play, small worlds, and fairy gardens. DIY fairy crafts also look beautiful displayed on nature tables, shelves, and windowsills throughout the home.
Related: DIY Rainbow Peg Dolls
Making Winter Peg Dolls:
These winter peg dolls appeal to a broad range of crafters. Wooden crafts and DIY toys made from natural materials, like these beautiful wooden fairy dolls, are especially popular with families, homeschoolers, Waldorf-inspired crafters, and anyone who enjoys seasonal or slow crafts.
Children enjoy making fairy crafts like these simple wooden dolls for their open-ended creativity and hands-on fun—teens and adults with a whimsical style like to place DIY fairy figurines around their homes and gardens. Many people in this age group also appreciate the calming, almost meditative process of making things by hand for themselves, others, or to sell.
The Many Uses for Winter Fairy Doll Crafts and Figurines:
Once made, winter fairy dolls can be used in many ways. They serve as wonderful toys for creative play, easily becoming characters in snowy forest adventures or winter stories. Many people enjoy using them as seasonal decorations placed on a windowsill, decorating a shelf, perched on a dresser, arranged on a nature table, or set within a winter scene.
Small and simple as they are, winter fairy peg dolls have a way of bringing warmth, creativity, and a touch of enchantment into the coldest months of the year.
These adorable winter fairies also make meaningful handmade gifts, party favors, or classroom projects, and some crafters even use them as storytelling props, advent figures, or gentle ways to encourage emotional expression and play. My preschool daughter loves to play with them, fly them around the house, and sing “Let It Go” pretending that the blue fairy doll is Elsa. Not kidding. It’s very sweet to watch. They are excellent little playmates for a young child with an active imagination.
How to Make Winter Fairies with Peg Dolls:
Making wooden fairy doll crafts is a creative winter activity idea for cold-weather days. Winter fairy peg dolls are wonderful for pretend or imaginative play and make unique winter decorations. Read through the step-by-step directions in the next section and gather materials from the list below before getting started with this winter craft.
Related: DIY Rainbow Ribbon Fairy Wands
Winter Fairy Craft Materials:
- Wooden Peg Dolls

- This set has enough peg dolls to make winter fairies, Rainbow Peg Dolls, Monarch Butterfly Peg Dolls, and Peg Doll Boats.
- Acrylic craft paint in winter-themed colors.
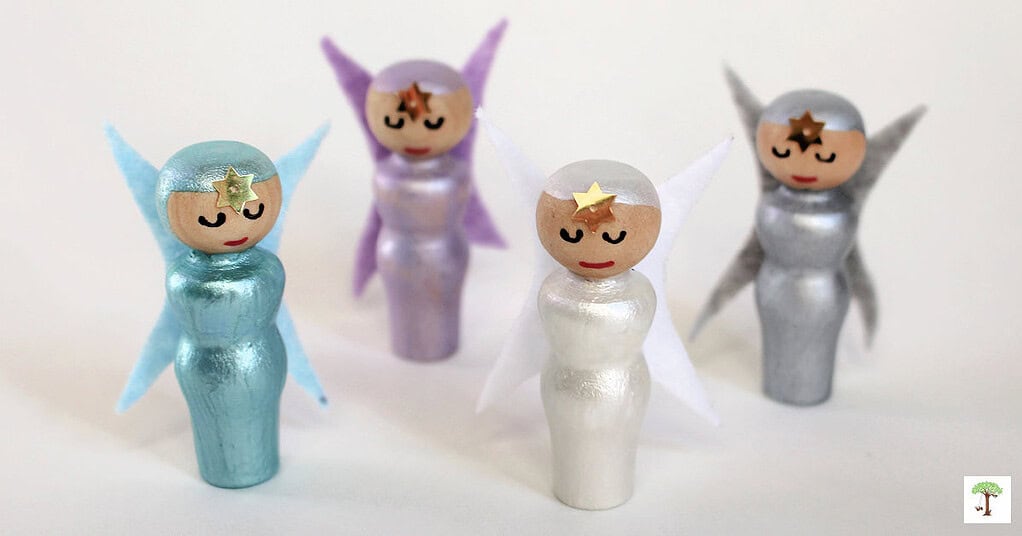
- The winter fairy dolls in the photographs are painted with the following colors: metallic platinum, purple martin pearl, aquarium pearl, mother of pearl, with cherry red for the lips.
- The winter fairy dolls in the photographs are painted with the following colors: metallic platinum
- Paint pens, a small paintbrush, or an incredible nib dipped into acrylic paint to create a simple face for the fairy dolls.
- Paintbrush set
- Mod Podge and a foam brush
- Felt–choose from the following:
- Wool felt
- Blended wool felt
- Acrylic felt
- Or another fabric of choice
- Sewing scissors (best for cutting felt wings, but don’t use them to cut paper)
- Hot glue, glue tape, or craft glue
- Gold or silver star sequins (optional, not for children under three years of age).
Related: The Best DIY Building Blocks for Kids
Related: Fairy Winter Wonderland Small World Sensory Play
Step-by-step Winter Fairy Doll Craft Instructions:
These cute little winter fairy peg dolls are surprisingly easy to make. They are an excellent addition to nature tables and fairy gardens, and are a lovely way to decorate the home in the winter.
1. Prepare work surface and gather supplies:
- Start by placing paper or cardboard on your work surface to protect it.
- Gather winter-colored paints such as icy blue, snowy white, frosty lavender, and pearly silver, as shown in the photographs, along with a paintbrush to begin.
2. Paint the fairy’s body:
- Use a paintbrush to paint the wooden peg doll bodies from the neck down to create the fairy’s clothing.
- Cover the peg doll’s head with painters’ tape before painting, if desired, to protect the face from paint.
- A single paint color can create the look of a gorgeous gown when applied to the body of a wooden peg doll shaped like a woman.
- Acrylic paint works best because it provides more opaque coverage than tempera paint, so fewer layers are needed to cover the wood.
3. Paint the fairy’s head or add hair:
- Use paint the same color as the body to frame the fairy’s face, making it look like she is wearing a gown with a head covering, as shown in the photos and step-by-step instructions here: Fall Fairy Doll Crafts.
- Alternatively, glue on a small amount of white or silver yarn or wool roving onto the head to create hair.
4. Create a simple face:
- Keep the fairy’s face simple.
- Painting small dots for eyes and a tiny curved line for a smile to give the doll an alert, open-eyed expression.
- Alternatively, paint small “U” shapes for eyes, as shown in the photos, to give the wooden toy a sweet, fairy-like expression, following the instructions here: Autumn Fairy Crafts.
5. Make the fairy’s wings:
- Create the fairy’s wings using felt.
- Choose felt in pale winter colors that match the body paint on the winter peg dolls, or use flittery fabric for a frosty, sparkling look.
- For example, use pale blue, white, silver, and light lavender felt to make winter fairies like those shown in the photos for this craft tutorial.
- Use a fabric marker or chalk to draw simple wing shapes on the felt.
- Pointed, rounded, teardrop, or snowflake-inspired shapes work beautifully, as do these angel wings. Or use the directions to make fairy wings here: Autumn Fairy Crafts.
- Use a good pair of sewing scissors to cut the wings from the felt.
6. Decorate fairy wings (optional)
- If you like, you can decorate the wings with hand-embroidered and stitched lines, drawn patterns, or small dots of paint to resemble ice crystals, snowflakes, or falling snow.
7. Attach the wings to the back of the fairy’s body:
- Once the wings are ready, attach them to the back of the peg doll.
- Hot glue, glue tape, or craft glue works well for this step.
- Hold the wings in place for a few moments to ensure they are securely attached.
8. Add embellishments and finishing touches:
- Add any optional finishing touches that make each winter fairy unique.
- Glue or paint tiny snowflakes on the dress.
- Add embellishments (such as a star on their forehead), handmade felt accessories, or other hand-painted details to the doll’s outfit. A tiny cape, earmuffs, a winter hat, and mittens can create minor character differences that add to each fairy doll’s personality.
9. Place on display or give as a gift:
- When the fairy is finished, and the paint and glue are dry, your wooden winter fairy dolls are ready to display on a shelf, use in imaginative play, or give as handmade gifts.
- Each fairy will have its own personality, making the process just as magical as the finished dolls.
Alternative Instructions for Making Fairy Doll Toy Crafts:
Click HERE to visit another tutorial with step-by-step instructions for fall fairy dolls, complete with photos. The tutorial shares how to make fall fairy dolls, substitute acrylic paint and felt in the winter-themed colors suggested above and in the craft materials for this post, rather than the autumn-themed craft materials shown in the tutorial photographs. Read through the instructions for more complete step-by-step instructions.
Related: DIY Projects for Do-It-Yourself Families
Winter Fairy Crafts for Kids and Adults:
As you can see, making winter fairy dolls from simple wooden peg dolls is a magical craft with endless possibilities. Make some to share with your kids and loved ones. Or get out the craft supplies to make them as a group project or activity at home or in the classroom.
For more peg doll crafts, check out the list below. You might also enjoy learning how to make a fairy garden, or this Fairy Winter Wonderland for small world play and fairy decor.
Learn more about Nell Regan Kartychok, author, photographer, and creator of this original winter fairy peg doll craft HERE, and Rhythms of Play HERE!


Leave a Comment