
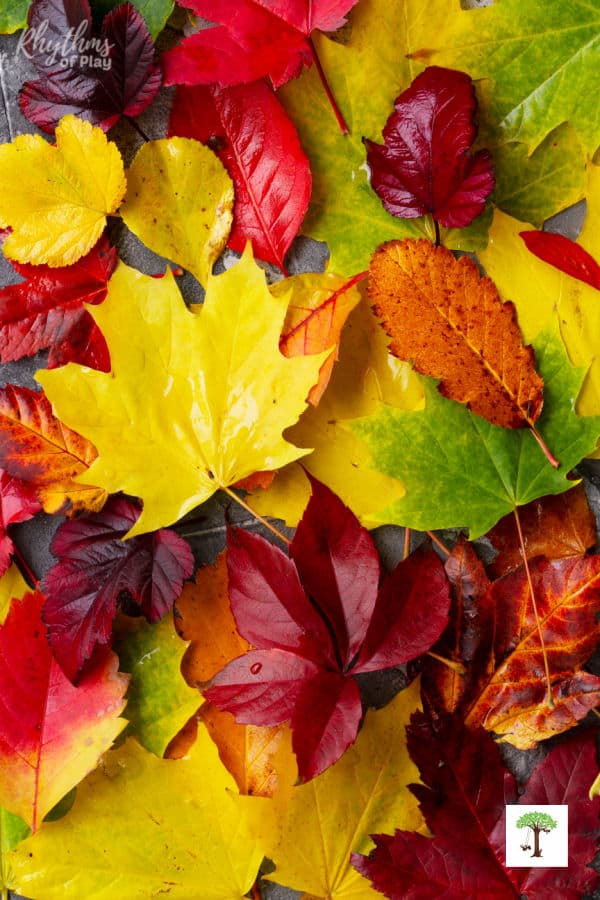
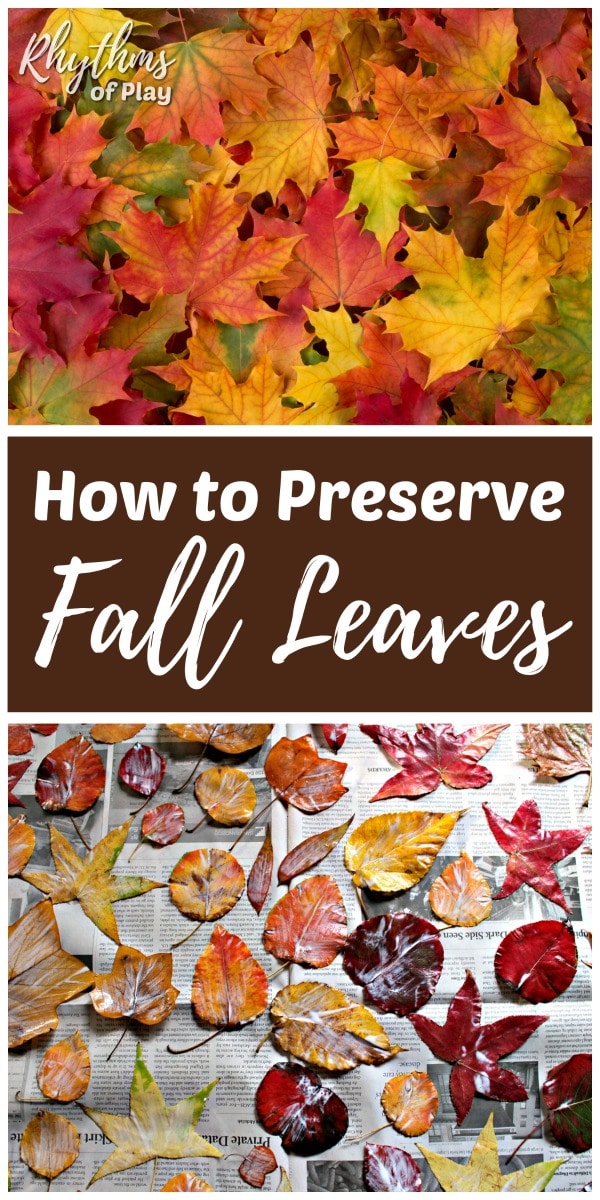
If you love autumn colors, learn how to preserve fall leaves so you can keep them longer!
To preserve fall leaves for crafts, collect colorful leaves in good condition, press and dry them, then brush on a thin coat of Mod Podge or clear-drying white glue. Let the coating dry before turning the leaves over or using them.
Can you preserve leaves without losing color? You can help leaves retain some color, but no home craft method guarantees they will stay as bright and flexible as the day you collected them. Most leaves fade over time, depending on how you use and store them. For example, the leaves we used to make leaf lanterns lost much of their vibrant autumn color after repeated candle use and sun exposure.
Start with colorful leaves, handle them gently, and keep the finished leaves away from direct sunlight and moisture. My family enjoys preserving autumn leaves for nature crafts. Below, I’ll share our Mod Podge method, a simple trick to keep the work surface cleaner, and what happened to the leaves we saved for ten years.
This Guide to Preserving Fall Leaves Includes:
Read through the tutorial, or use the jump links below to go directly to the topic that interests you:
- Collect, Press, and Preserve Leaves for Nature Crafts and Art Projects
- Methods for Preserving Autumn Leaves
- Materials Needed for Preserving Leaves with Mod Podge or Glue
- How to Preserve Fall Leaves with Mod Podge: Step-by-Step Instructions
- Preserving Leaves with Mod Podge: One Side or Both?
- How to Help Preserved Leaves Keep Their Color
- How to Use, Store, and Care for Preserved Leaves
- How Long Do Preserved Leaves Retain Their Color and Suppleness?
- Troubleshooting Tips for Preserved Leaves
- Frequently Asked Questions About Preserving Leaves
- Preserve Leaves and Use Them for Nature Crafts and Art Projects
- Fun Ways to Use Preserved Fall Leaves: Nature Crafts and Art Ideas
- Other Recommended Methods to Preserve Autumn Leaves
Collect, Press, and Preserve Leaves for Nature Crafts and Art Projects:
As autumn’s vibrant foliage blankets the world in a rich tapestry of reds, yellows, and oranges, many of us are captivated by the fleeting beauty of changing leaves. But what if you could capture and preserve a piece of this natural spectacle to enjoy year-round at home or in the classroom?
Do you enjoy hunting for and collecting colorful leaves in the fall? Searching for gorgeous autumn leaves is a favorite fall activity in our home and homeschool. My family enjoys creating new nature crafts and art projects with the stunning array of fall leaves we gather and collect every autumn.
The problem is that they turn brown, shrivel, and crumble into pieces if you don’t use them right away. Today, I will share tips on what to do with fall leaves after you’ve collected them so that you can use them for nature crafts and art projects later. Once they’re dry, you can use your preserved leaves for leaf lacing, leaf crafts, leaf art projects, and much more!
Related: 14 Ways to Play and Learn with Fall Leaves.
Methods for Preserving Autumn Leaves
Several methods can preserve leaves. However, not all methods work the same or produce the same results. This DIY tutorial teaches you how to press leaves before painting them with Mod Podge (or a slightly watered-down PVA or white glue) to preserve their natural beauty.
To preserve autumn-colored or green leaves, you can also dip them in beeswax warmed in a double boiler or candle-making kit, press them between pieces of wax paper with a hot iron, soak them in glycerin, spray them with hairspray or varnish, or place them between laminating sheets and then use a laminator to seal them inside.
Each method produces different results; some require more advanced techniques, and others change the leaves’ color or texture. For example, glycerin can help leaves remain flexible, but treatment may take several days or longer and can change their color. It is not a reliable way to keep every autumn leaf its original shade.
Experiment with each method to see which you prefer most. Some methods are easier than others, so it’s essential to consider this when working with children, such as toddlers or preschoolers. Working with melted wax or a hot iron is probably not the best option for toddlers and younger children.
Of all these leaf preservation techniques, my family enjoys painting glue on leaves to preserve them, as instructed here. It may be messy, but I share an easy trick in the step-by-step tutorial to help simplify the process and make it less messy, so anyone can do it.
Read on to learn how below. Or skip the step-by-step instructions and see the resources at the bottom of this post for more information on preserving leaves using other methods. For more creative ideas, explore this list of fall art projects and painting ideas.
Supplies for Preserving Leaves
- Fall Leaves in good condition
- A leaf press, or heavy books and a firm, flat surface. The following are a few leaf presses you can consider, but heavy books work just as well:
- Absorbent paper, such as blotting paper, paper towels, or heavyweight cardstock
- Mod Podge or clear-drying white glue mixed with water
- A soft glue paintbrush or a foam brush
 Protective covering for your work surface: Newspaper, an old sheet, wax paper, etc.
- An old magazine or catalog (optional but very helpful)
- Space for the leaves to dry without touching

 Protective covering for your work surface: Newspaper, an old sheet,
Use Mod Podge as directed for your formula. If using white glue, choose one that dries clear. If it needs thinning to brush easily, add only a little water at a time. You won’t need much to make it easier to paint onto the leaves.
Test a few leaves before coating an entire collection. Different leaves and finishes can give different results.
Related: Nature Crafts and Nature Art Activities
How to Preserve Fall Leaves with Mod Podge: Step-by-Step Instructions:
These simple, step-by-step instructions guide you through preserving leaves with Mod Podge or clear-drying white glue. Preserving leaves lets you create fall arts and crafts with beautiful autumn colors. Please read the instructions before getting started so you know the steps involved and what to expect.
Related: Fall Nature Table Ideas for Natural Learning
1. Gather and Collect Colorful Fall Leaves Before They Become Brittle:
- To preserve leaves, start by collecting them outside. Collect only where permitted, and leave plenty of fallen leaves for wildlife and the soil.
- Look for recently fallen leaves that still bend without breaking.
- Avoid gathering overly dry or crumbling leaves; choose freshly fallen or recently picked leaves that are supple and flexible.
- Skip leaves that are moldy, mushy, or have any signs of rot.
- Bring your collection home in a container that protects it from crushing.
- Begin preparing the leaves promptly instead of leaving them in a damp pile.
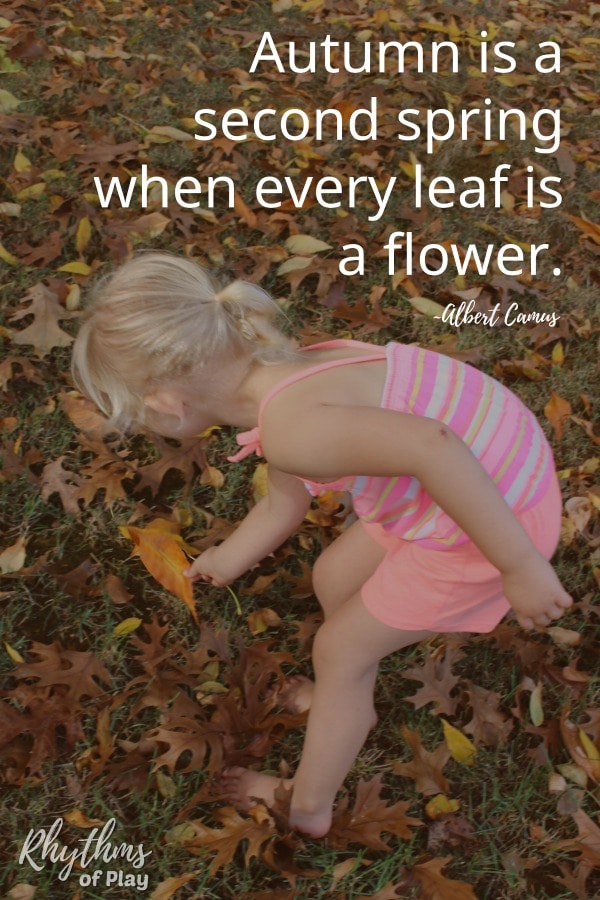
One of our favorite fall activities is going on a nature hunt for vibrant, fresh, fallen leaves to bring home to create nature crafts or press and preserve for later. My daughter gets excited every time she races for a pretty leaf, as you can see in the photo below!
Related: Marbled Clay Autumn Leaves Craft
2. Clean and Dry Leaves:
- After you collect a few gorgeous autumn leaves, clean them and prepare them for pressing.
- Make sure the autumn leaves (or green leaves) are clean and dry on the surface before pressing, or excess moisture may encourage mold.
- Gently brush away loose dirt. If needed, carefully rinse the leaves, blot away excess water, and let the surfaces dry before pressing and preserving them.
3. Press Leaves (optional):
- After cleaning and drying the leaves, press and flatten them with a leaf press or heavy books. The craft supplies above suggest a few leaf presses you can use. Or press and flatten the leaves using books, following the step-by-step directions below.
- Pressing leaves before preserving them is optional, depending on the result you want.
- To keep the leaves flat and prevent curling as they dry, press them before proceeding to the next step.
- If you don’t mind the leaves curling, feel free to skip pressing them.
- Place the autumn leaves into a leaf press, or follow the step-by-step instructions for pressing leaves with books (or heavy flat objects) below:
How to Press Leaves with Books:
- Arrange several clean, dry leaves, with or without their stems attached, on blotting paper, several layers of paper towels, or heavyweight paper, such as cardstock, without overlapping them.
- Place another piece of blotting paper, several pieces of paper towel, or cardstock on top of the leaves.
- The paper absorbs moisture and keeps the leaves in place. Make sure the fall leaves lie flat and don’t overlap under each layer.
- If you have more leaves to preserve, place them on the second layer of paper.
- Place another sheet of paper, or several pieces of paper towels, on top of the leaves.
- Repeat these steps until you have stacked all the leaves you want to press between the sheets of paper. (Keeping the leaves separated with blotting paper, paper towels, or heavyweight paper helps ensure the leaf stems don’t bruise the leaves above and below)
- Once you’ve finished stacking the leaves, press them. Place large, heavy books, binders, or other heavy objects on top to press them flat.
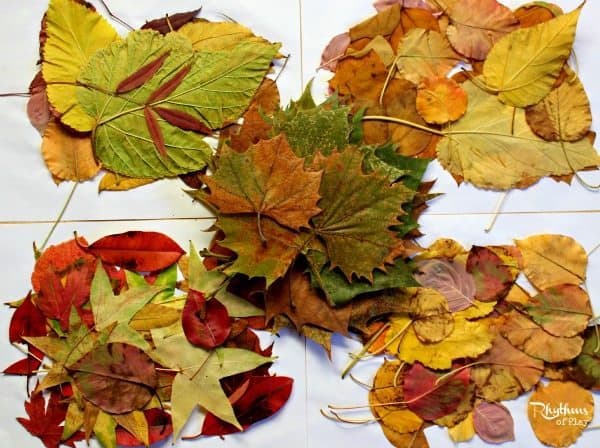
- Press the fallen leaves for 12–24 hours to help flatten them. Depending on the leaves and conditions, they may need longer to flatten, but the goal is not to dry them out completely; it’s to flatten them so you can preserve them while they still retain their color.
- Check the leaves and replace any damp paper with dry sheets if you continue pressing them longer than a day. Keep the press in a dry place with good air circulation to help prevent mold.
Related: How to Make and Keep a Nature Journal or Notebook
4. Preserve Leaves with Mod Podge or White Glue:
- Cover a table or surface large enough to dry the autumn leaves you’ve collected with newspaper, an old sheet, or waxed paper. Although the photo below shows newspaper, wax paper helps keep the leaves from sticking as they dry.
- The step-by-step DIY leaf preservation technique below describes how to paint Mod Podge (or a slightly watered-down, clear-drying white glue) onto autumn leaves to preserve them.
- Applying Mod Podge to a fall leaf is almost impossible without spreading it all over the surrounding area. However, I have developed a super-easy leaf-preserving hack when preserving them with Mod Podge or watered-down, clear-drying white glue, described in the step-by-step instructions below. This will help you (or your children or students) preserve leaves with Mod Podge without making a huge mess!
- Other methods to preserve leaves are listed at the bottom of this article; use the jump link to go directly to that section if desired.
Related: Outdoor Learning Ideas and Nature Activities for Kids
How to Preserve Leaves with Mod Podge or White Glue:
- After protecting your work surface with waxed paper (or newspaper), paint the leaves with Mod Podge to preserve them. You can also paint leaves with clear-drying white glue mixed with water to preserve them, but make sure the mixture isn’t too runny.
- Place the fall leaves, Mod Podge (or a glue-and-water mixture), and a glue paintbrush or a foam brush on the covered work surface.
- Grab an old magazine or catalog to provide a surface for applying the Mod Podge quickly without worry. (This step is optional but helpful.)
- Open it to the first page, and use your foam brush to apply a thin, even layer of Mod Podge to one side of the fall leaf.
- Lay the autumn leaf down in a single layer on the covered work surface with the Mod Podge side facing up.
- Repeat the steps above with the next leaf.
- After using the first page of your catalog to paint a few leaves with Mod Podge, it will be nice and sticky. Turn the page to a new, clean surface. This means you will slowly glue the catalog pages together as you work. For this reason, using a magazine or catalog you don’t care about is essential.
- Repeat the steps above until you’ve painted all the leaves you want to preserve.
- Let the preserved fall leaves dry. Allow the first coat to dry completely.
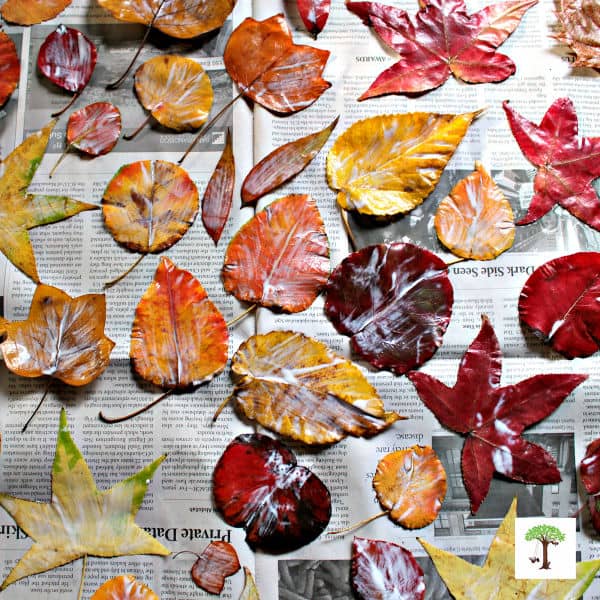
5. Let the Coating Dry Before Turning the Leaves
- Wait until the coating is clear and dry before handling the leaf or applying anything to the reverse side, if desired. Read my comments below about preserving leaves with Mod Podge on one or both sides.
- Thin coats of Mod Podge are generally touch-dry in about 20–30 minutes, but temperature, humidity, and coating thickness affect the timing. Handle gently during the first 24 hours and follow your product’s directions. Full curing can take several weeks. Plaid’s drying and curing guidance
- If the surface feels tacky, give it more time. Don’t stack coated leaves while they can still stick together.
6. Coat the Reverse Side if Desired
- Once the first side is dry, turn the leaf over and brush a thin coat onto the back if you want both sides coated. Let it dry again.
- I’ve saved leaves coated on one side and leaves coated on both sides. Both have worked for our crafts, although they have aged differently.
- Coating both sides does not guarantee permanent color or make a leaf unbreakable. Try a few of each and compare the results for your project.
Preserving Leaves with Mod Podge: One Side or Both?
Many crafters say it’s best to apply Mod Podge (or white glue) to both sides of a leaf. Coating both sides covers the entire leaf rather than leaving the underside exposed. In my experience, leaves coated on both sides were sturdier, but coating both sides didn’t necessarily preserve their color better.
However, I tried both options: preserving the leaf with Mod Podge on only one side (the top) and on both sides (the top and bottom). The leaves painted on one side retained a good amount of color and stayed flexible, making them well-suited for art projects such as watercolor and fall leaf art. However, I found it best to store them flat so they didn’t curl before I was ready to use them. In contrast, fall leaves painted and preserved with Mod Podge on both sides are better suited for sturdy crafts, such as leaf lacing.
I still have the box of autumn leaves that I collected and preserved when I wrote this post ten years ago. Believe it or not, some of the most vibrant colors that remain only have glue painted on one side. While those painted on both sides are sturdier and better preserved, both options work. I recommend experimenting to see which option works best for your needs. Please scroll down for more of my best leaf preservation tips, and see how the preserved fall leaves look after a year and 10 years later!
How to Help Preserved Leaves Keep Their Color
Start with leaves whose colors you already love. A coating will not restore color that has disappeared.
To give your collection the best chance:
- Prepare leaves before they become damaged or brittle.
- Replace damp paper during pressing.
- Let leaves dry before coating them.
- Apply thin coats and allow drying time.
- Display and store finished leaves away from direct sunlight.
- Keep the collection dry and handle it gently.
Photograph special leaves before preserving them. You’ll have a record of their fresh colors and a useful comparison as they age.
How to Use, Store, and Care for Preserved Leaves:
Let the leaves dry and the finish cure according to the product directions before packing them away. Store them flat in a rigid container, protected from crushing, direct sunlight, and moisture. Avoid tightly packing the box.
Check that the leaves and container are completely dry before closing the lid. If coated leaves stick together, don’t pull them apart forcefully—you may tear them.
Preserved fall leaves will maintain their vibrant colors longer if stored in an airtight container out of direct sunlight. Depending on the leaf type, preserved leaves can also still curl and wrinkle.
To keep your preserved autumn leaves flat, press them again once the Mod Podge or white glue is completely dry and no longer tacky, and keep them flat until you are ready to use them. You can make several crafts and art projects with preserved autumn leaves. Explore these crafts and art projects for fun ways to use your preserved autumn leaves.
Related: Fall Books for Kids: Autumn Stories Children LOVE!
How long do Preserved Leaves Retain Their Color and Suppleness?
Leaves can yellow over time when you preserve them with Mod Podge, especially if they are exposed to direct sunlight or candlelight. Air exposure can also cause preserved leaves to degrade slightly over time. To keep your preserved fall leaves vibrant, store them in an airtight container out of direct sunlight, as recommended above
For example, the fall leaf colors on the leaf lanterns my daughter and I made have faded significantly after several hours of candlelight, but we still love the way they look, both lit and unlit. So I keep digging them out of storage each fall to add to our home decor.
2016 Update: after one year:
The leaves my daughter and I collected and preserved last year are still gorgeous. Some of our preserved autumn leaves have become brittle over time, and some of the vibrant autumn colors have faded slightly. Still, I have plenty of red, yellow, and orange preserved leaves to work with after a year of storage.
They have lost some of their flexibility, and some have become somewhat brittle, but most remain surprisingly colorful. The photo of the “Thankful” leaf below was taken a year after I preserved it with a coat of Mod Podge on its surface.
I didn’t apply Mod Podge to the underside of the leaf; I applied one coat only to the top. Once it dried, I used a white paint pen to doodle dots and write “Thankful” on it, then attached it to a DIY thankful tree my family made and decorated with real leaves with words of gratitude written on them.

2020 Update: after five years
I have a box filled with some of the leaves my daughter and I preserved five years ago, which (believe it or not) are still ready to use for arts and crafts. My family has used the preserved leaves repeatedly to decorate our Thankful Tree with real leaves, which still work well. The colors have faded slightly since they were first preserved, especially the reds and yellows, but they are still looking pretty good.
2025 Update: after ten years
Believe it or not, the photo below was taken in 2025, ten years after I preserved the leaf with Mod Podge, allowed it to dry, and then wrote “Thankful” on it with a white paint pen. You can see the sides of the leaf aren’t any more damaged than in the photo above, taken one year after it was preserved.
I’ve kept it in a plastic shoebox with several other leaves I preserved in 2015. Some are painted on both sides, while others, like this “Thankful” leaf, have only one coat of Mod Podge. Most of the colors have faded, yellowed, and browned, but this maple leaf, along with several others, retained a good bit of color.

Related: Healthy Pumpkin Cranberry Bread Recipe
Troubleshooting Preserved Leaves
| Problem | What to check or change |
|---|---|
| Leaves curl | Start with fully pressed, dry leaves if a flat result matters, but leaves can still curl |
| The coating stays sticky | Allow more drying and curing time; use thinner coats on the next batch |
| Leaves turn brown | Try a small batch of another leaf type and expect some natural color change |
| Leaves crumble | Begin with leaves that are still flexible and support them while handling |
| Mold appears | Discard affected leaves; check moisture, airflow, and damp pressing papers |
| Leaves stick to the work surface | Keep the wet side facing up and test the drying surface with one leaf first |
Frequently Asked Questions
Still have questions? Here are a few answers to some common FAQs about preserving leaves that may help.
Can You Preserve Leaves with White Glue?
Yes. Clear-drying white PVA glue is an alternative for this craft. Test your glue on a few leaves first, and avoid making the mixture watery.
Can You Mod Podge Fresh Leaves?
For the flat-leaf method above, start with fresh leaves, press them, and dry them before coating. If you don’t mind curled leaves, you can paint them with Mod Podge right away.
How Do You Preserve Maple Leaves?
Follow the same steps to collect, press, dry, and coat. Choose undamaged leaves before they become brittle, and test several colors, since results can vary.
Do You Have to Press Leaves?
Pressing is useful when you want a flat result. If your project needs a leaf’s natural shape, choose a drying method that supports that shape instead. Expect the shape to change as the leaf dries. They don’t always stay flat when they dry, even if you press them first, and they can curl even more if you don’t press them at all.
Can You Preserve Green Leaves Without Losing Color?
You can try preserving green leaves, but the coating doesn’t guarantee they will stay green. Test a small batch and compare it with an untreated leaf over time.
Can You Preserve Leaves with Hairspray?
Hairspray is sometimes suggested for leaf crafts, but I recommend starting with the brush-on method explained here. Hairspray formulas vary, and a sprayed coating doesn’t guarantee the original color will last.
Can You Write on Mod Podge Leaves?
Yes, you can write on leaves preserved with Mod Podge. Let the coating dry first, test your pen on a spare leaf, and allow the writing to dry before handling it. My family uses paint pens to write on leaves for our DIY thankful tree, but permanent markers also work. You can also use them to doodle or draw on the leaves.
Will Preserved Leaves Last Forever?
There are no guarantees; nature always has its own way, and how you use and store them will affect the results. Expect changes in color, texture, and flexibility. Some of my saved leaves stayed useful for years, but that doesn’t guarantee the same for every leaf or preservation method, and they likely won’t last forever.
Related: Thanksgiving Traditions and Fun Things to Do on Thanksgiving.
What to Make with Preserved Leaves
Use your collection for leaf pictures, gratitude decorations, seasonal displays, and other indoor nature crafts.
Choose leaves that suit the project: thin, flat leaves for paper art, and sturdier leaves for activities that involve more handling. Make a small test piece before using your favorite specimens.
Preserve Leaves and Use Them for Nature Crafts and Art Projects:
Pressing and preserving fall leaves is a simple crafting activity suitable for both kids and adults. Once finished, you can use preserved leaves to create leaf lacing crafts, nature crafts, leaf art, and other beautiful fall decorations.
Whether you’re a seasoned leaf preserver or trying this classic nature craft for the first time, preserving leaves is a lovely way to keep the spirit of fall alive at home or in the classroom. Use your collection for nature crafts, fall art projects, and autumn decorations throughout the harvest season.
For more seasonal ideas, explore these fun fall activities and crafts, plus a free printable bucket list!
Learn more about Rhythms of Play on our About page, or meet the creator and author, Nell Regan Kartychok.
Fun Ways to Use Preserved Fall Leaves: Nature Crafts and Art Projects
- Fall Leaf Crown Craft
- DIY Leaf Lanterns
- Fall Leaf Lacing
- How to Make a Thankful Tree for Thanksgiving with Real Fall Leaves
- Heart Leaf Lanterns
- Watercolor and Fall Leaves Art
- Turkey Leaf Lanterns
- Thanksgiving Turkey Leaf Nature Crafts
- Best Fall Nature Crafts: Includes leaf art ideas and nature crafts made with real fall leaves.
- Autumn Leaf Fish in the Sea Art
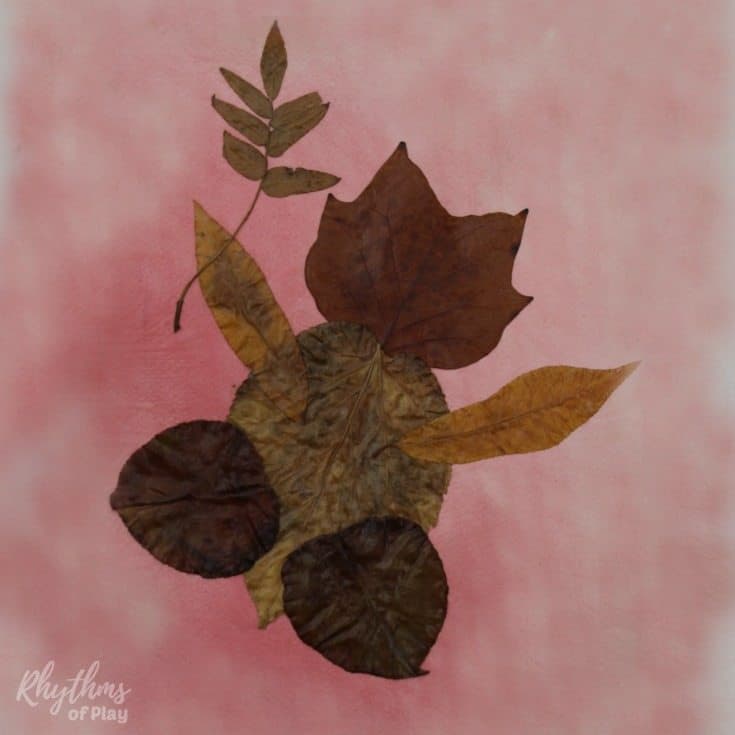
- Fall Leaf Baby: The picture below was taken when the fall leaves used to make it were two years old. As you can see, they lose a bit of color over time but are still lovely!
Other Recommended Methods to Preserve Autumn Leaves:
As mentioned above, you can try several other methods for preserving leaves. Learn how to preserve leaves with wax or glycerine with the following DIY project tutorials:
- Press them between sheets of wax paper with an iron, or learn how to preserve fall leaves in a glycerin bath with Chelsey’s leaf-preserving tutorials on Buggy and Buddy.
- Learn how to preserve fall leaves with beeswax with Tara at Little Pine Learners. Her step-by-step tutorial includes photographs of the process and ideas for using the finished leaves.
- Maggy Woodley at Red Ted Art has another write-up on six commonly used leaf preservation methods, complete with a video on how to use glycerine to preserve autumn leaves.
 to preserve autumn leaves.
If you liked How to Preserve Autumn Leaves, You Might Also Like
- Outdoor Learning and Nature Activities for Kids
- The Best Fall Art Projects for Kids
- Best Thankful Trees for Thanksgiving
- Real Flower Nature Crafts
- Nature Crafts and Art Ideas





Love this!! Ive been wanting to try leaf preserving but just havent done it yet. Do you find Mod Podge easier than Beeswax?
Yes, I find it a bit easier to preserve fall leaves with Mod Podge or a watered-down white glue with the hack I use described above. I like how beeswax preserves leaves, however, I find that heating and using beeswax is a bit of a pain. Mod Podge works great, but the leaves can get a bit stiff. My best advice is to give both a try and find what you like best. You may find that you like beeswax for some projects and Mod Podge for others. I have also heard that glycerine works, but I have yet to try it myself.
Wow, wish I had read this before I painted my Magnolia leaves with Modge Podge, what a sticky mess. I’m excited to use the old magazine trick!!
As I wrote I’m doing Magnolia leaves, they are rinsed and dried but not pressed. I read another blog which said they needed 4 coats, I don’t think I can handle doing that 3 more times. Have you done any Magnolia leaves and had success with one coat of Modge Podge on each side?
Oh my goodness Debbie!
I’m so sorry that I missed your question. We never apply more than one coat, and often do not preserve magnolia leaves because they are so thick. Magnolia leaves should be fine with just one coat, but they will most likely break if crushed. 🙂
Making magnolia leaf wreath. Picked leaves, did not wash. Covered both sides with Modge Podge. Let dry. Attached to vine wreath with wire. Left for three days before continuing. Leaves mostly turned very brown. What did I do wrong, please?
Hi Jeri, I’m so sorry that you had so much trouble and that your project did not turn out the way that you had planned. That’s never what I like to hear, but I’m glad you asked.
As I mentioned, leaf preservation is an imperfect science. I have discovered that magnolia leaves turn brown pretty quickly no matter what you do so their color does not preserve well. Other leaves fair better but ultimately lose some color over time.
Sorry about that!
Can you write on Mod Podged leaves?
Yes, Amy, you can use a paint pen to write on leaves preserved with Mod Podge or a watered-down PVC glue. In fact, the photograph of the maple leaf that reads “thankful” was preserved before I wrote on it. Enjoy the fall!
Nell
Hi. Thanks for providing all this useful information. I have a question: why press the leaves before preserving? I have a project in which I’d like the fall leaves to be their natural shape. Is it okay to “leave” them as is when applying the preservative? (The leaves will ultimately be encased in epoxy.) Thanks.
Great question and good point, Gray! You don’t need to press them; it just works best for most crafts. But, if you would like the leaf to retain its natural shape, of course, preserve it as is. The method for preserving fall leaves described above is a great way to do that! I love the idea of encasing autumn leaves in epoxy and would love to see the final product! I would complete the project as soon as you can to help the fall leaves retain their gorgeous autumn colors. Good luck!
Thanks for the ideas. I have preserved leaves with hair gel , hair spray , hair mousse. I always read the ingredients in hair products and choose the ones with glycerin as one of the first few ingredients.
The ones with more water than glycerin don’t preserve leaves very well. I have some leaves I preserved 5 years ago that still hold their color well. Of course using hair spray too much is not good for our lungs. So using the pump spray hair spray works as well, but it tends to be messer.
Thanks for the alternative option to preserve leaves, June. I agree, using aerosol hair spray isn’t good for our lungs or the environment, but using a pump spray to preserve leaves is a better option even though it’s messier. I would use the same method described in this tutorial to help keep the mess under control.
THANK YOU for keeping us posted with updates at five and 10 years respectively. This guide was thorough and contained the exact information I was looking for along with helpful pictures.
You’re welcome! I’m so glas you appreciated the preserved leaf updates at five and ten years. I’m just glad I put those leaves away in a shoebox, and that I still have them! Thank you for the nice comment and vote of appreciation. It makes the effort I put into this website worth it.